Can I Perform Freezer Repair Myself?

3498b11e be52 4769 be6f eb989e92ef1e

Having trouble with your freezer? Before you call in the professionals, you might be wondering if there are simple fixes you can do yourself. In this post, we’ll explore some common freezer problems, steps you can take to repair them, and when you might need to call in an expert.

Identifying Common Freezer Problems

Before jumping into repairs, it’s essential to diagnose what might be wrong. Common problems include unusual noises, inadequate cooling, or frost buildup. By identifying the issue, you can determine if it’s something you can fix yourself.

One of the first signs that your freezer might be in trouble is if it’s not keeping items as cold as it should be. This could be due to several reasons: the thermostat settings might be off, the door seals may need a check, or there might be a frost build-up blocking the vents. Another frequent issue involves unexpected noises coming from the unit, which might indicate a problem with the motor or compressor that could be more complex to resolve.

The issue of frost buildup is particularly common. It usually results from a damaged door seal or the defrost mechanism not functioning properly. Identifying the root of the problem early can prevent further complications and may even save you from having to call in a professional.

Basic Tools Needed for Freezer Repair

For minor repairs, a few basic tools will help you get started. These might include a screwdriver, multimeter, and a flashlight. Having the right tools on hand can make a world of difference in the efficiency of your repairs.

Additionally, a multimeter can be particularly useful for testing the electrical connections and ensuring they are working correctly. It’s a handy tool for diagnosing whether electrical components such as the thermostat or compressor are the culprits behind your freezer issues.

Apart from that, having an owner’s manual at your fingertips can guide you through identifying parts and potential issues specific to your freezer model. If you misplaced yours, most manufacturers offer digital copies on their websites.

Step-by-Step Simple Fixes

Handle easy repairs such as checking the thermostat settings, inspecting door seals, and defrosting blocked vents. These simple steps can often resolve issues without professional help.

Start by evaluating whether the freezer is plugged in and the outlet is working. It seems simple, but it’s a common oversight. If the outlet is functional, proceed to inspect the freezer’s electrical cord for signs of damage. However, if the electrical system is not the issue, the next step would be to check the door seals. Performing a ‘dollar-bill test’ can help verify the condition of these seals.

Defrosting blocked vents is another fix that can be managed at home with minimal tools. Simply turn off the freezer and let it sit until the ice melts away. However, be cautious to keep an eye on the water collection to avoid it overflowing.

Knowing When to Call a Professional

There are situations where professional expertise is crucial, like when dealing with electrical problems or significant mechanical issues. Attempting complex repairs without the proper knowledge might worsen the problem.

Complex problems, such as those involving the compressor or intricate electrical issues, should definitely be left to the experts. These components can be costly to replace, and improper handling could void any warranties you may have. If after executing all the DIY steps your freezer still underperforms, consider consulting a professional to avoid further damage.

Do not hesitate to reach out for help if during your assessment you notice unusual electrical signs, such as broken wires, scorched marks on plugs, or if the coils are not faring well even after cleaning. It’s always better to be safe than sorry.

Safety Tips for DIY Freezer Repairs

Ensure your safety by unplugging the appliance before starting any repairs and using protective gear when necessary. Safety should always be a priority, no matter how small the task.

In addition to unplugging your freezer, it’s wise to work in a well-lit area and keep your tools organized to prevent accidents. If you’re planning to move your freezer to access parts, get help to avoid injury and ensure stability throughout the repair process.

Handling electrical components can be hazardous. Use insulated tools and consider wearing gloves to protect against potential shocks. If you’re ever uncomfortable or unsure, it’s perfectly okay to pause the repair and decide if professional intervention is needed.

DIY Freezer Repair: Know Your Limits

While some minor freezer issues can be resolved with a bit of DIY work, other problems may require a professional touch. It’s important to know your limits and, above all, prioritize safety when attempting any repairs. With this guide, you now have a better idea of what you can tackle yourself and when it’s time to seek help.

Preventing Costly Dishwasher Repairs: Maintenance Tips

Dishwashers are indispensable kitchen appliances that save us time and effort. However, without proper maintenance, they can become a source of unexpected expenses. In this blog, we’ll explore easy and effective maintenance tips to help you avoid costly dishwasher repairs and keep your machine running smoothly.
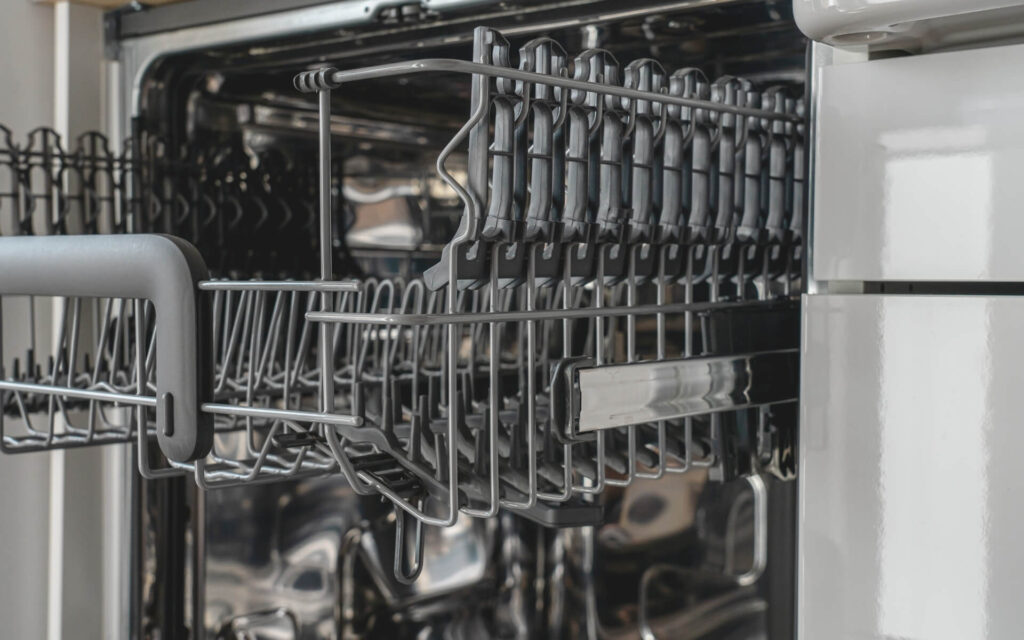
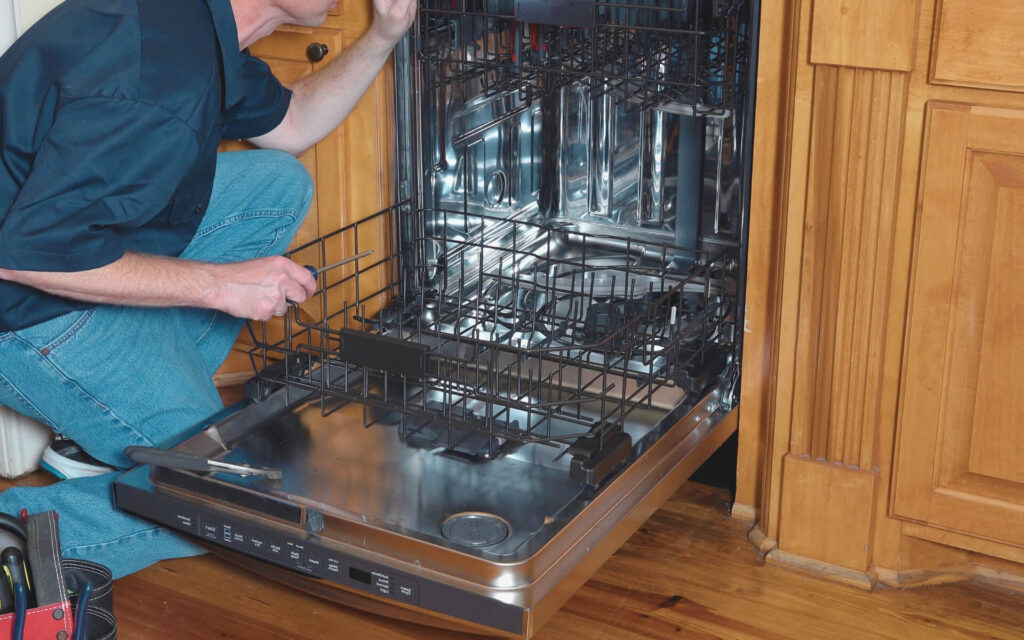
Close-up Photo of Dishwasher Tool

Understanding Your Dishwasher’s Anatomy

Before diving into maintenance tips, it’s important to familiarize yourself with the key components of your dishwasher. Learning about the location and function of filters, spray arms, and detergent dispensers can greatly enhance your ability to clean and maintain the appliance effectively. Think of it as the foundation for all future maintenance endeavors. Identifying these parts will not only aid in better cleaning but also assist you when it’s time to replace any faulty parts. You might be surprised to find how often simple awareness of these components can prevent issues from escalating into major repairs.

Not sure where to start? A good approach is checking your user manual, which often provides detailed diagrams and descriptions. Nowadays, you can even find online resources to guide you through understanding your dishwashers’ anatomy Dishwasher Maintenance Tips. This preparatory step is not about troubleshooting; it’s about empowering you with knowledge to confidently manage your dishwasher’s upkeep. From spray arms that rotate to ensure water reaches all dishes, to the filters that trap food particles and prevent clogging, each part plays a vital role in your dishwasher’s efficiency.

Regular Cleaning to Prevent Build-up

Regular cleaning acts as the cornerstone of dishwasher maintenance. Even though dishwashers are inherently designed to clean, food particles and mineral deposits often escape from the cleaning cycle. Left unchecked, these residues can evolve into formidable blockages that hinder performance. A combination of DIY maintenance tips and a little elbow grease can keep your dishwasher in peak condition. For example, routine cleaning of filters, spray arms, and door seals is crucial. Explore simple strategies to combat these build-ups using household items such as vinegar and citrus drink mix, transforming these ordinary ingredients into powerful cleaning agents How to Clean a Dishwasher for Optimal Performance.

You may start by cleaning the filters at least once a month, as these catch food particles and often become the primary site of build-up. For this, simply remove the filter and rinse it under running water to eliminate grime. Next, spray arms can be unclogged easily by poking a toothpick through any blocked holes. Lastly, don’t underestimate the power of a toothbrush to scrub door seals clean of dirt and grease, which can prevent effective sealing and lead to leaks. Not only will this enhance the cleaning quality of your dishwasher, but also prevent odors and mechanical problems associated with heavy residue accumulation.

Inspecting and Replacing Components

Just as regular cleaning helps maintain performance, timely inspections of your dishwasher’s components are essential in preempting more serious problems. Every month, take a few moments to check for signs of wear and tear. Pay special attention to door seals, racks, and hoses. If you stumble across any sign of abrasion, cracking, or inconsistency, acting swiftly by replacing the damaged parts can circumvent more substantial problems. Call for a professional check-up annually as suggested by Professional Dishwasher Maintenance Matters. This proactive step will save both time and money, as small repairs often snowball into more costly repairs if left unmanaged.

Regular inspections afford you the opportunity to identify failing sprayers and compromised seals before they manifest as serious operational failures. Moreover, they allow you to explore extended benefits such as improved efficiency and reduced energy consumption. By preventing larger malfunctions, regular inspections safeguard you from unexpected repair bills. It’s not just about replacing what’s broken; it’s about prioritizing functional performance and maintaining an efficient operating system. Remember, if a dollar bill can easily slip out when trapped in your door seal, it’s likely time for a professional inspection or replacement action.

Proper Detergent Usage

Your choice of detergent and how much you use can be a game-changer for your dishwasher’s efficiency and longevity. Overuse or reliance on incorrect detergent types often leads to unnecessary residue buildup, sometimes escalating to blockages that impair your dishwasher functioning. A rule of thumb is to always follow the manufacturer’s recommendations for both type and quantity of detergent. This ensures that the soap accurately breaks down and provides optimal cleaning without adverse effects such as soap scum or lingering residues. For a seamless cleaning experience, consider tips from experts on maintaining an efficient dishwasher and combat detergent buildup effectively.

It’s also worth noting that hard water conditions amplify the need for adequate detergent usage. Compensate by employing specially-formulated dishwasher detergents or add a water softener to your routine. Having these items on hand can prevent the dreaded ‘cloudy dish’ phenomenon often attributed to hard water and improper detergent integration. This conscientious approach to detergent usage doesn’t just preserve your dishwasher; it also contributes to its cost-effective operation by mitigating the factors that usually lead to premature repairs and replacements.

Listening for Unusual Noises

Beyond visual inspections, understanding the sounds your dishwasher makes can provide invaluable insights into its health. Much like a car engine, a dishwasher typically operates within a predictable acoustic range. Becoming attuned to the familiar hum and swish can enable you to detect anomalies early. Unusual noises such as grating, grinding, or thumping should be viewed as alarms warranting immediate investigation. Identifying these early warnings can often lead to simple solutions before escalating into major repair requirements Why Professional Dishwasher Maintenance Matters.

Moreover, noise awareness can translate into cost-saving measures. For instance, persistent gurgling noises may indicate blockages that are easily cleared through basic cleaning or inspecting of spray arms and drainage systems. If strange sounds persist, consulting with a professional can avert severe damages that might result in unexpected expenses. Your dishwasher’s soundscape can effectively guide you toward maintaining peak functionality and reliability. In tune with these indicators, you’ll find that proactive noise checks not only ensure safety but also reflect an unwavering commitment to efficient kitchen management.

Maintaining the Water Supply

Lastly, the water supply is foundational to your dishwasher’s operational efficiency. The efficiency of the appliance significantly hinges on both water quality and supply pressure. Regular checks of hoses for potential leaks or blockages are indispensable in maintaining that solid supply chain. Further, hard water supplies can bring their own set of challenges, predominantly in the form of mineral clogs and deposits. Regular descaling treatments can effectively combat these deposits, ensuring smoother operation and preventing long-term damage. For additional peace of mind, setting a reminder to inspect your hoses every six months can prevent minor issues from escalating into costly repairs.

By maintaining a clear, steady water line, you not only enhance your dishwasher’s performance but also minimize the risk of water damage to your kitchen. Addressing any pressure inconsistencies promptly can also stave off potential complications. The importance of continually verifying water supply functionality cannot be overstated, as it goes hand-in-hand with conserving water, optimally cleaning your dishes, and relegating repairs to a last resort. Essentially, attentiveness to water maintenance amplifies your dishwasher’s durability and supports sustainable kitchen practices.

Keep Your Dishwasher Running Like New

Regular maintenance of your dishwasher not only extends its lifespan but also saves you from unexpected repair costs. By following these simple tips, you can ensure your dishwasher remains efficient and reliable for years to come. Invest a little time in maintenance today to save yourself stress and money in the long run.

10 Common Signs You Need Oven Repair and What They Mean

Ovens are an essential part of every kitchen, helping us bake, broil, and roast our favorite dishes. However, like any appliance, ovens can wear down over time and may require repair. Spotting the signs early can save you from inconvenient breakdowns and costly replacements. In this blog, we’ll discuss common indicators that your oven may need professional attention and what each sign could mean for your appliance.

4a153d05 4bc0 408a a0a3 5f83b2d71565

1. Uneven Cooking or Baking

If you’re noticing that your dishes are coming out oddly cooked—burned on one side and raw on the other—there could be a problem with your oven’s temperature regulation. This issue often arises when the heating elements are not functioning as they should. A malfunctioning fan in a convection oven can also contribute to uneven heat distribution, leading to inconsistent cooking results. Understanding these signs early can help in diagnosing the root cause.

Spotty baking not only affects your cooking but can lead to wasted resources. Imagine preparing a cake for a special occasion only to find it ruined because of uneven heat. Fixing this issue could be as simple as repositioning the oven racks or might require professional oven repair.

2. Inconsistent Oven Temperature

Fluctuating oven temperatures might indicate a faulty thermostat or sensor, leading to unreliable cooking results. Your thermostat or sensor may be to blame if your oven is constantly over or under-heating your meals. As temperatures dynamically change, this can create frustration, particularly when following precise recipes. A failure in this area necessitates an immediate check-up by an expert.

Temperature inconsistencies can heavily impact dishes that require specific cooking conditions. For instance, baking bread with a malfunctioning thermostat could cause it to come out dense or undercooked. Furthermore, regular calibration or sensor replacement is often necessary to maintain efficiency and consistency.

3. Failure to Heat Up

An oven that refuses to heat up or takes an excessive amount of time to reach the desired temperature is likely suffering from an electrical issue or a broken heating element. Elements can degrade over time, and in some cases, the wiring itself may need to be checked by a certified technician.

Having a non-heating oven can turn a simple dinner into an evening of stress. This can oftentimes be traced back to a blown fuse or tripped circuit, particularly in older models, or wiring issues that require a critical look from a specialist.

4. Strange Noises

Odd noises coming from your oven, like buzzing, rattling, or scraping, could point to problems with the oven’s fan or motor. Ovens are designed to operate quietly, so any unusual sounds could signal that internal components have become loose or worn out.

Ignoring these sounds can exacerbate the issue over time, potentially leading to more significant damage or malfunction. Timely intervention can restore peace and quiet to your kitchen while preventing further deterioration. If you hear these sounds, consider contacting a repair specialist to diagnose and fix the root cause.

5. Unusual Odors

Persistent strange smells could be a result of food residue burning or a more serious electrical issue that needs immediate attention. While it’s common for an oven to emit odors when initially turned on, continuous strange smells aren’t something to ignore.

Beyond unpleasantness, unusual odors can also indicate potential safety risks, especially if they resemble gas or burning chemicals. Electrical issues or smoldering internal components pose fire hazards, demanding swift professional evaluation.

6. Door Issues

If the oven door doesn’t seal properly or won’t close at all, it can lead to heat loss and inefficient cooking. Such issues can often be attributed to worn hinges, a broken door latch, or a damaged gasket.

A compromised oven door can make all the difference in cooking efficiency, driving up energy use and elongating cook times unnecessarily. Replacing or repairing these components can reinstate proper functionality, ensuring even heat retention and more reliable cooking outcomes.

7. Burner Malfunctions

Oven burners that flicker or don’t ignite fully might require burner replacement or an adjustment to the electrical supply. Such issues could signify obstructions or clogs in the gas lines for gas burners, or problematic contact points in electric burners.

Addressing flickering burnings expediently can prevent additional complications. It’s usually advisable where feasible to clean the burners, unblocking any debris affecting function, or alternatively, to have them assessed professionally for replacement.

8. Control Panel Glitches

A control panel that responds slowly or behaves erratically might be a sign of wiring issues or digital controller failure. Malfunctions here could manifest as non-responsive buttons, error messages, or issues with digital readouts.

Handling these digital issues includes basic checks such as ensuring the panel is free of moisture and debris. Persistent issues should involve consulting a technician to explore potential wiring or digital control faults.

9. Self-Cleaning Problems

When the self-cleaning function can’t complete its cycle or creates a lot of smoke, it might require a repair to ensure the feature works correctly. During intense cleaning cycles, ovens should safely increase inner temperatures to burn off residue without causing further issues.

If excessive smoke or lingering residencies occur, it could point to either an element age factor or blockage combined with processing faults, which are ideally handled hands-on by oven repair professionals.

10. Excessive Energy Use

A sudden spike in your energy bill could indicate that your oven is working harder than it should due to inefficiencies or faults. An ageing element may need to power up excessively, or seal issues could lead to prolonged energy demands.

Evaluating ongoing energy consumption profiles can help identify whether an underlying technical issue persists. If suspicions arise regarding operational inefficiencies, seeking advice from a reliable service provider could yield sustainable results.

Why Timely Oven Repair Saves You Money

Dealing with a faulty oven can be frustrating and inconvenient. What many homeowners may not realize is that procrastinating on oven repairs can lead to higher costs in the long run. In this blog post, we’ll explore how timely oven repair can be a savvy financial decision.
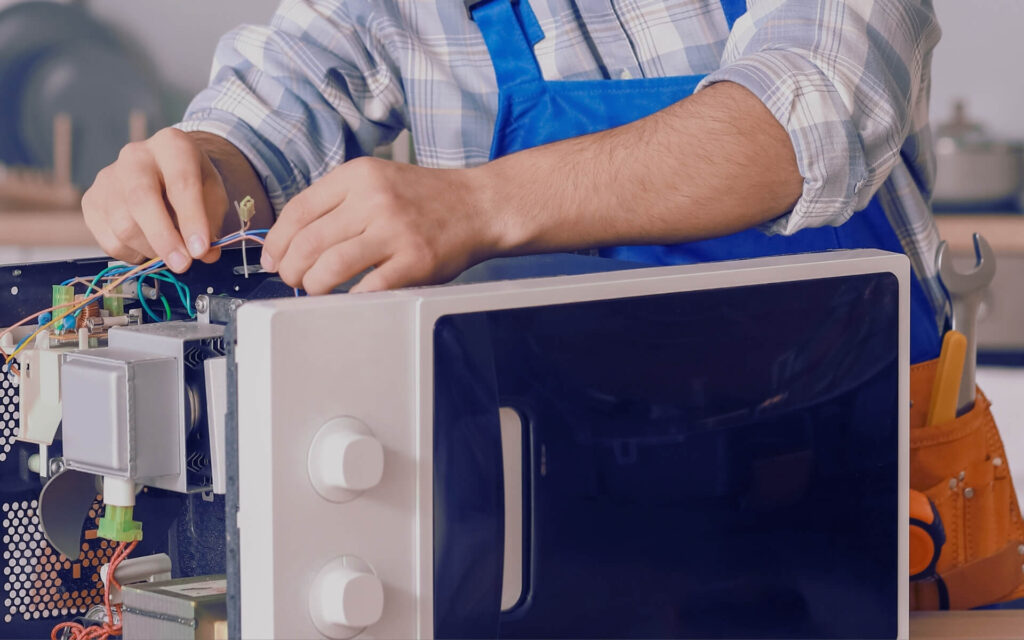
Crop faceless man fixing cables in system unit

Understanding the Importance of Oven Maintenance

Regular maintenance can keep your oven running smoothly and efficiently. Just like any other appliance, it requires attention to prevent wear and tear that can lead to bigger problems. By routinely inspecting and cleaning your oven, potential issues can be spotted early on. For instance, ensuring the oven door seals properly can prevent heat escape, which not only saves energy but also maintains a consistent cooking environment. Additionally, simple tasks like cleaning the vents and wiping down the interior can enhance the appliance’s performance.

An essential tip for oven maintenance involves being attentive to any unusual sounds or odors coming from your appliance. Often, these signals indicate an underlying problem that needs addressing. Visit our Oven Repair Tips page for more detailed guidance on maintaining your appliance.

Moreover, looking at the broader picture, timely repairs and maintenance of ovens contribute significantly to household safety. According to Appliance Repair OKC Services, a defective oven can pose risks such as fire hazards. Addressing these potential safety issues should be a top priority for any homeowner.

Common Oven Issues You Shouldn’t Ignore

From unusual noises to uneven baking temperatures, identifying early signs of failure can save you from more significant expenses down the road. For example, if you notice that your oven is taking longer than usual to preheat, this could point to a malfunctioning temperature sensor. Ignoring such problems can expedite further damage, making subsequent repairs costlier.

Another common issue is fluctuating temperature control, which can waste energy and lead to unsatisfactory culinary results. For those experiencing similar troubles, checking out our Stove Repair Tips may provide valuable insights. It’s crucial to handle these issues promptly to avoid increasingly expensive energy bills.

Cost Implications of Delayed Oven Repairs

Delaying repairs not only exacerbates existing issues but can also increase your energy bills due to inefficient operation. Learn how postponement can impact your finances. As highlighted by industry experts at Appliance Repair OKC Services, not addressing issues timely can lead to further complications that require pricier resolutions.

Additionally, neglecting minor problems often results in needing to purchase new components or even a whole new oven. Financially speaking, it’s much more prudent to invest in minor repairs before they become larger, more costly problems. This also highlights the wider economic benefit of regular appliance upkeep where cost-saving translates to whooping reductions in overall household utility expenses.

Maximize Energy Efficiency with a Well-Maintained Oven

A properly functioning oven uses less energy, resulting in lower electricity bills. Discover how proactive repairs contribute to energy efficiency. A critical element of maintaining efficiency is ensuring that the oven’s seal and insulation remain intact.

Understanding the utility of periodic checks on oven components such as burners and igniters can lead to noticeable improvements in performance. Our Microwave Repair Tips offer a comparable understanding of appliance care that can easily be applied to different types of ovens, maximizing your household’s energy use.

Extending the Lifespan of Your Oven Through Timely Repairs

Regular repairs and maintenance can elongate the life of your oven. Explore the benefits of keeping your appliance in top shape for years to come. Prompt responses to minor issues prevent wear and tear that weaken the components gradually.

Moreover, adhering to a scheduled maintenance plan not only fosters longevity but it also leads to enhanced safety and reliable performance. Apart from effectively managing repair costs, a well-maintained oven allows homeowners to utilize its full potential over the years without frequent disruptions. For more on handling your kitchen appliances wisely, check out our comprehensive guides available through the Homepage.

The Smart Choice for Your Kitchen and Wallet

Timely oven repair is not just a matter of convenience but a smart financial decision. By addressing issues early, you prevent minor problems from turning into costly repairs, keep utility bills in check, and extend the appliance’s lifespan. So, don’t wait for that strange noise or uneven heat to resolve itself—act quickly and enjoy the peace of mind that comes with a well-functioning oven.

Troubleshooting Common Trash Compactor Repair Issues

Dealing with a malfunctioning trash compactor can be quite frustrating, especially if it’s an appliance you rely on regularly. Luckily, many common issues can be resolved with a bit of troubleshooting. This blog will guide you through the typical trash compactor repair problems and simple solutions to get your appliance back in working order.

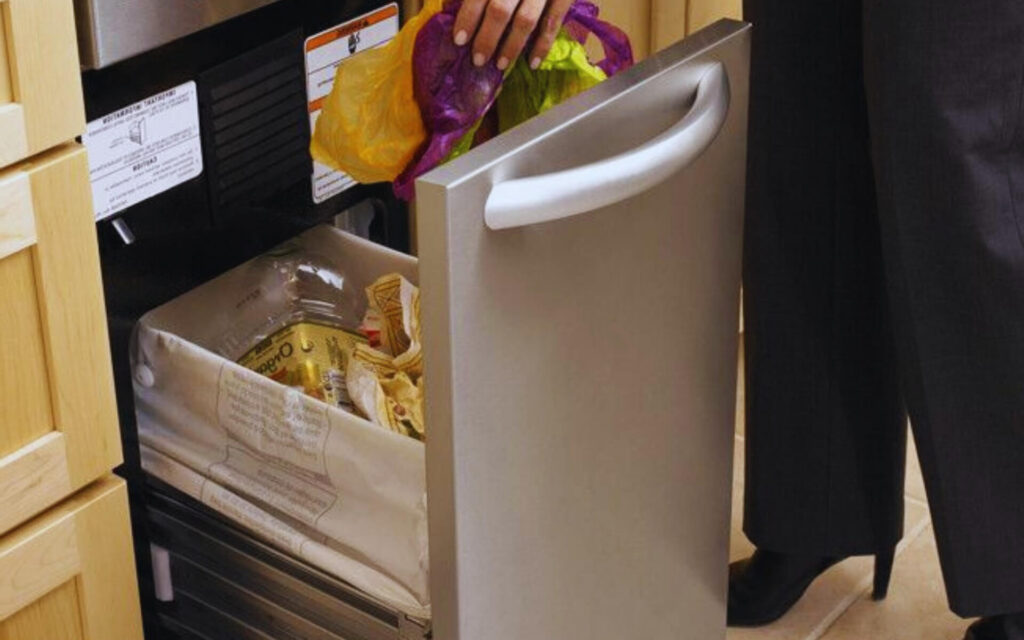
Trash Compactor Picture

Safety First: Precautions Before Starting

Before diving into troubleshooting, it’s crucial to prioritize safety. Always unplug the trash compactor and ensure that your hands are dry. Gather the necessary tools, such as a screwdriver and a pair of gloves, to safely interact with the appliance.

Additionally, familiarizing yourself with the emergency stop switch, if available, is a smart precaution. This switch quickly halts the compactor’s operation in case something goes unexpectedly wrong. Never put aerosol cans or flammable items into the compactor, as they can explode or cause fires. By setting these safety measures in place, you reduce the risk of injury or further damage to your equipment.

Understanding the Basics of Your Trash Compactor

To effectively troubleshoot, it’s important to have a basic understanding of how your trash compactor works. Understanding components like the ram, motor, and switches can provide insight into what might be causing an issue.

The main function of the trash compactor involves an electric or hydraulic ram compressing trash into tight bundles. Commonly, machine operation begins when trash is placed inside and the start switch is activated. Learning the foundational aspects of each component, like how the ram moves or why switches are critical, sets a strong base for effective repair and diagnosis. For a more detailed breakdown of trash compactor functions and parts, you can refer to this guide on trash compactor repair.

Identifying Common Issues and Their Causes

Common problems include the compactor not turning on, strange noises, or the ram getting stuck. Each issue can stem from different causes, such as faulty wiring, motor issues, or jammed components.

For instance, strange noises could indicate a possible problem with the motor or ram. Inspecting internal components like rollers, bearings, and the drive chain often reveals wear-and-tear damage that leads to noises or functional disruption. Understanding the frequent failures of switches and sprockets, and recognizing what constitutes ‘normal’ vs. ‘abnormal’ operation, goes a long way in ensuring a smooth troubleshooting process.

Step-by-Step Troubleshooting Guide

Begin with simple checks like inspecting the power source, assessing the controls, and checking for any blockages. Follow a step-by-step process to eliminate possibilities one by one, allowing you to pinpoint the root cause efficiently.

Should your initial checks not resolve the problem, delve deeper by examining more complex components like the ram or motor. For those unsure about their technical capabilities, understanding the methodical approach can be gleaned from engaging in easy breakdowns available in the Trash Compactor Repair Tips by My Appliance Repair Pro, ensuring you follow safe and effective diagnostic procedures.

Knowing When to Call a Professional

If troubleshooting doesn’t resolve the issue or if you encounter any complex electrical problems, it’s best to contact a professional. Understanding when professional intervention is necessary can prevent further damage and ensure safe operation.

You might find it challenging to determine the line separating a DIY fix from professional aid. However, when facing intricate electrical mishaps, opting for professional expertise ensures effective resolutions without the risk of escalating the damage. If you need specialized assistance, the professionals at My Appliance Repair Pro provide qualified services that get your appliance back to optimal functionality.

Maintenance Tips to Prevent Future Issues

Regular maintenance, such as cleaning the compactor components and checking for wear and tear, can prevent many common issues. Implementing these proactive measures will help your trash compactor function efficiently for years to come.

Consistency in upkeep not only provides longevity but also reduces instances of unexpected breakdowns. For example, periodic checks on the drive chain or belt for suitable tension can greatly extend the useful life of your compactor parts. Initiating these routine assessments, as advised by seasoned experts, is a practice recommended by resources from Trash Compactor Repair.

Final Thoughts on Trash Compactor Troubleshooting

Understanding and troubleshooting common trash compactor issues can save you both time and money. By following the steps outlined in this guide, you can easily determine when simple fixes will suffice or when it’s time to call in a professional. Keep your trash compactor running smoothly, and enjoy the convenience it brings to your everyday life.

8 Cool Tips:  The Ultimate Guide to Refrigerator Maintenance

Refrigerator Maintenance TipsKeep it Cool and Fresh: The Ultimate Refrigerator Maintenance Tip.  Picture a world without your trusty refrigerator—no cold drinks, no fresh groceries, just room temperature chaos! Your fridge is the unsung hero of your kitchen, silently working to keep things cool and fresh. But, like all heroes, it needs a bit of attention to stay in top shape. So, let's dive into some super-easy refrigerator maintenance tips to ensure your cool companion keeps things chill and fresh in your kitchen!


The Cool Stats: Why Refrigerator Maintenance Matters

Before we get into the nitty-gritty, here's a stat to kick things off: Did you know that well-maintained refrigerators can use significantly less energy? That's not just good for your wallet; it's also a win for the planet! Now, let's explore some essential refrigerator maintenance tricks to keep your fridge humming efficiently.


Cleanliness is Cool: Tackling the Refrigerator Grime for a Germ-Free Refrigerator

First things first, a clean fridge is a happy fridge. Regular refrigerator maintenance starts with cleaning the inside of your fridge on a monthly basis.  It might not be the most exciting task, but it's crucial for keeping germs away and your food safe.

Spill Response: Don't let spills linger! A quick cleanup when something spills is like giving your fridge a high-five for keeping things tidy.

Filter Maintenance for Efficient Refrigeration

Ensure the longevity of your refrigerator's water dispenser and ice maker by maintaining the filters. Regular cleaning or replacement is essential to prevent mineral deposits and maintain optimal functionality.

Filter Care Guidelines

Check the Manual: Refer to your refrigerator's manual to determine the recommended frequency for filter cleaning or replacement.

Keep a Spare Filter: Have a backup filter available for prompt replacement when needed.

Periodic Inspection: Occasionally inspect the filter to assess whether cleaning or replacement is necessary.

Managing Odor and Freshness in Your Fridge

Combat unwanted odors and maintain a fresh-smelling refrigerator by addressing plastic shelving absorption and implementing effective odor control measures.

Odor Control Strategies

Baking Soda Solution: Place an open box of baking soda inside the fridge to absorb odors and neutralize acids causing unpleasant smells.

Deodorizer Usage: Employ a fridge deodorizer or a non-toxic, food-safe disinfectant (e.g., water and white vinegar) to eliminate smelly bacteria from shelves.

Recommended Refrigerator Maintenance Timeline

Filter Cleaning (Reusable): Twice a year, soak in a mixture of warm water and white vinegar for at least 10 minutes. Rinse until clean and allow to air dry.

Filter Replacement (Non-reusable): Every 6 months or as per the manufacturer's recommendation.

Fridge Deodorizer Update: Every 2-3 months for continued freshness.


The Art of Organization: Keeping It Cool Inside

Ever opened your fridge and felt like you're starring in a game of food hide-and-seek? A well-organized fridge not only saves time but also helps your fridge work efficiently.


Temperature Tango: Finding the Sweet Spot

Refrigerator MaintenanceYour fridge has a temperature sweet spot and finding it can save you big bucks. The ideal fridge temperature is around 37-40°F (3°C). Set it too low, and you're wasting energy; set it too high, and your food might not stay fresh.

Also, regulating your kitchen’s temperature can have a significant impact on the energy your refrigerator uses.  Your ideal room temperature should not be anything over 70 degrees.  For each degree over, your refrigerator will use 2.5% more

energy. Checking the temperature settings—37 to 38 degrees Fahrenheit for the fridge and 0 degrees for the freezer—can save up to 15% on energy bills annually.


Give It Some Breathing Room: The Outside Counts Too

Your fridge needs space to vent its heat. If it's sandwiched between the wall and other appliances, it must work harder. A 3 inch gap is recommended to help increase circulation and reduce energy consumption.


Checking the Door Seals: Keep the Cool In and the Warm Out

When performing routine refrigerator maintenance, door seals are like its secret keepers, making sure the cool air stays inside where it belongs. If they're not in good shape, your fridge could be working harder than it needs to.

Dollar-Bill Test: Wondering if your seals are up to the job? Try the dollar-bill test. If a dollar bill slips out easily when you close the door on it, it's time to get those seals checked by a pro.


Clearing the Heart: The Importance of Clean Coils

Refrigerator Maintenance TipsNow, let's dive into the heart of your fridge—its coils. These coils work hard to release the heat from inside to the outside air, but if they're covered in dust, your fridge can't do its job properly.

A study found that cleaning your fridge coils twice a year can make it 25% more efficient. That's like giving your fridge a power boost! Coils at the back of your fridge help it cool efficiently,

but they can get dusty. Refrigerator maintenance includes a quick vacuum or wipe-down every six months to can keep things running smoothly


Fill 'Er Up: Why a Full Refrigerator is a Happy Fridge

Believe it or not, refrigerator maintenance includes a full house. It's not just about having snacks ready; it helps your fridge run more efficiently.

Thermal Mass Wisdom: Adding some empty bottles to your fridge helps it absorb warm air more efficiently when the door is open. It's like giving your fridge a little extra help.


Monthly Refrigerator Maintenance Guide for Peak Performance

Taking care of your fridge doesn't have to be complicated. Follow these simple steps each month to ensure your refrigerator stays in optimal condition.

Monthly Refrigerator Maintenance Routine

Dispose of Expired Items: Throw away any old or expired items from your fridge.

Deep Clean Shelves and Drawers: Remove shelves and drawers to clean thoroughly. For tough spills, use a cleaning solution and wipe with a damp cloth.

Reorganize Your Fridge: Put items back in an organized manner, ensuring vents are clear for proper air circulation.

Check Filters: Inspect your fridge's filter and determine if it needs replacement or cleaning based on the model.

Inspect Gaskets: Examine the gasket to confirm there are no issues with the fridge's seal.

Improving Refrigerator Efficiency

Boost your fridge's efficiency with these additional tips to reduce energy consumption and maintain optimal temperatures.

Allow Leftovers to Cool: Before storing leftovers, let them cool to avoid affecting the fridge's temperature.

Know Your Refrigerator: Familiarize yourself with your refrigerator model's features, including any power-saving switches or manual defrost requirements.

Signs of Refrigerator Issues

Be aware of signs indicating your fridge may need attention to prevent potential problems.

Excessive Heat: If you feel heat from the back, consult a refrigerator repair contractor.

Constant Fan Noise: Investigate if the fan is consistently running, and check the gasket to ensure the door is properly sealed.

Refrigerator Maintenance FAQs

Answers to common questions about refrigerator maintenance and lifespan.

How Long Should a Refrigerator Last?

A well-maintained fridge should last a minimum of 10 years, with potential for 20 years or more.

Do Refrigerators Lose Efficiency Over Time?

Normal wear and tear occur, but proper care can extend the fridge's efficiency.

Is Repairing a 15-Year-Old Refrigerator Worth It?

Consider replacement if your fridge is over 15 years old for cost-effectiveness.

Can a Fridge Last 30 Years?

While unusual, some fridges can last over 30 years, but aging appliances are more prone to issues.

How Long Does a Compressor Last?

Compressors can last over 10 years with proper maintenance; consider replacement after 8 years if issues arise.


Wrapping It Up: Happy Fridge, Happy Home

Refrigerator MaintenanceRefrigerator maintenance doesn't have to be a big task. With these simple tips—checking seals, cleaning coils, giving it a monthly cleanup, monitoring temperatures, and keeping it well-stocked—you're ensuring your fridge stays fresh and efficient. So, give your fridge the love it deserves, and enjoy a happy, chilled-out kitchen!


Want more content from My Appliance Repair Pro?

How to Run a Refrigerator in a Hot Garage

5 Quick Ways to Keep Your Refrigerator Running Like New

How to Run a Refrigerator in a Hot Garage

Shop fridge. Beer fridge. Snack fridge. Whatever you call it, a refrigerator in the garage provides extra space and convenience. But most garages aren’t climate controlled, meaning sweltering summers pose a few problems for ideal operations. High temperatures add stress to the machine by forcing the motor to run constantly, especially if your garage exceeds 110 degrees. At best, energy bills will spike. At worst, the motor could burn out from overuse, leading to food spoilage.

Keep It Full

In a hot garage, the refrigerator will battle against the ambient temperature to keep your goodies cold. Help it out by keeping it well stocked. If you don’t need the whole refrigerator, consider filling space with gallons of water. They will remain cool and help the refrigerator maintain its temperature when the door is opened on a hot day. In an empty refrigerator, warm air rushes in and cold air rushes out every time the door opens. Water -- or anything else you keep in the fridge -- will leave less room for warm air, allowing the inside air to return to appropriate temperatures far faster when the door is closed.

Take Charge

Kitchens specifically wired for refrigerators are guaranteed to have proper hookups. Garages are not. Ensure the refrigerator is equipped with a 115 volt, 60 Hz, AC-only electric outlet. Without the correct type of electrical hookup, the refrigerator will not receive enough power. It might not be able to run its motor properly, leading to further strain on the condenser and inability to produce enough cold air. If you don't have the proper hookup or if you are unsure, consult an electrician to set up the proper wiring.

Cool It

GE recommends refrigerators be placed only in rooms where the temperature range stays between 60 and 110 degrees Fahrenheit. In warmer conditions, the refrigerator will not stop running and risks burning out because of overuse. If your garage regularly exceeds 110 degrees, it's not the ideal location for a refrigerator. If you want to place a refrigerator in a very warm garage, consider ways to keep the temperature down. Insulation, supplemental air conditioning, fans and vents will help with cooling. Check all doors and windows for leaks and add weather stripping if necessary to keep heat out as much as possible. Cover windows to minimize heat from the sun. Remove or unplug any additional appliances not in use.

Be Careful What You Store

Even if you follow the proper precautions, placing a refrigerator in a room with extreme temperatures carries increased risk of operational failure. Thus garage refrigerators work well for storing extra beverages, pantry goods or other things that won’t perish if the machine can't handle the heat. Avoid storing highly perishable items during warmer months.

Warning

Some manufacturer warranties could be voided if the machine is placed in a garage at risk for extreme temperatures. Proving whether the temperature has remained in the acceptable range for repair claims is difficult, so if warranty coverage is a concern, ensure your machine doesn't have such a clause. Follow all manufacturer specifications for installation and clearance around the appliance.

Courtesy of sfgate.com

5 Quick Ways to Keep Your Fridge Running Like New

1. Check the door seals.

A loose seal allows cool air to seep out.This is not only an energy waster but it makes your fridge work a lot harder than necessary. First make sure the seals are free of food residue. (Clean them about twice a year, using a toothbrush and a solution of baking soda and water.) Then try the dollar-bill test: Close the bill in the door so that half is in and half is out. If it slips out easily, you may need to have the door seals checked by a pro.

2. Keep the coils clean.

When the condenser coils (see following page for more on parts) are covered with dust, the refrigerator can’t run efficiently. Twice a year, pull the machine from the wall to reveal the coils in back (or snap off the grille, if the coils are on the bottom front), unplug the refrigerator, and vacuum using the brush attachment.

3. Set the right temperature.

Keep the fridge between 37 and 40 degrees Fahrenheit and the freezer at 0 degrees.

4. Fill it up (even if you never cook and only have takeout)

Refrigerators need “thermal mass” (a.k.a. lots of stuff) to maintain low temperatures. Cool foods and drinks help absorb warm air that streams in when you open the door. If you’re the eat-out type or your fridge is too big for your needs, store a few jugs of water in there.

5. Be prepared.

If your power goes out, keep the doors closed and use foods from the pantry. An unopened refrigerator will keep food safe for about four hours; a freezer will maintain its temperature for about 48 hours if full and 24 hours if half-full.